Quick Post-Processing for Food Shots Using Google's Snapseed on a Smartphone
Following the revival of my Youtube channel, I am now creating more fresh contents, but more focused on lighter guides and tips when it comes to general photography. I am not trying to add to the abundance of widely available "how to" videos or tutorials, instead I shall be sharing my own workflow on how I get some of my shots done as shown here on this blog. While most of my photography heavy content will be published on Ming Thein's site, here I shall discuss topics that are more photography beginner/new-comer friendly.
It does not matter if you are not using the latest iPhone or the best Samsung smartphone. Any mobile phone camera is sufficient for some quick food snapshots. I personally do not like the idea of spending almost RM6000 for that flagship smartphone, it is just absurd. Use what you have, make the best out of it, and here, some post-processing magic may just add the much needed impact to your shots.
Straight out of camera shots from smartphones are usually dull and lack the "oomph" that make people go wow. The quick fix is normally the appalling filters or horribly rendered presets of ugly color bleaching and hipster-looking touch-ups. I believe photographs should be shown as close as possible to reality and post-processing can be used effectively to accomplish just that. Adding dark corner vignetting, overly warm color tones and that unfitting vintage look will not do your food photograph justice. Therefore, I was compelled to do a short step by step video to show you how you can achieve a decent looking food shot by improving it in post-processing using Snapseed by Google, an image editing app available free for both Android and iOS. Spending that additional 1 minute or less for each photograph will make a world of difference. Watch the video below to find out how.
Generally, here are the tips that can help you with your image editing, especially for food shots:
1) Color Balance
The camera may not necessarily get the color balance (white balance) right all the time, hence it is crucial to pay attention to the colors of the image you have shot and how closely they match what you saw in real life. Sometimes the camera overcompensates the colors, artificially neutralizes the natural warmth in the image resulting in cool, bluish tint that may not look so attractive in the image. Depending on the app that you use, the quick fix would be pushing the "warmth" slider to either boost the warmth or tone it down for that natural pleasing look.
2) Uneven Lighting
One of the important tips in shooting food is to have good light, and that usually means shooting what's on the table near the window. This often results in uneven light on the food, casting shadows in parts of the plates or bowls. In order to produce a more balanced image, adjust the "shadow, ambiance and highlight" sliders. Sometimes, uneven lighting may give you better results, as having shadows at the right places can shape your subjects better. Nonetheless, you have to be the judge of how much shadow is permissible, and if you have no control during the shoot itself, at least these tools in image editing allow you to manipulate the final result to a certain extent. Balance is what we are after here.
3) Edit In Moderation
Do not over-edit your image. I know it is easy to get carried away when there are so many sliders and you want to just push them everywhere to see what happens. The more you edit the more degradation will happen to the image. The less you edit, the simpler and less manipulation to the image, the better the final output will be. The less is more principle applies here. You are editing on a lossy image file (JPEG). Unless your smartphone allows you to shoot RAW (lossless) but I would recommend you not to do so unless you know absolutely what you are doing with a RAW file. If you are a practicing photographer and you are shooting RAW you should not need to read this guide. For everyone else, stay with as minimal editing as possible.
4) Boost Saturation and Contrast
The two important things when it comes to food shots are: texture and color of the food. In order to add depth and create that highly realistic look, adding both saturation and contrast can add impact to the food images. This works particularly well with shots that have multi-color food, such as vegetables and fruits. Textured food such as bread, noodles, or drinks with bubbles can benefit from contrast boosting.
5) Say No to Filters
I cannot emphasize this enough, using those stylistic filters generally destroys food shots. You can apply those filters on your photos of cats, your selfies or that nice looking bouquet of flowers. But never use them on food shots as they will rob away the natural colors or tones that make the food shots shine.
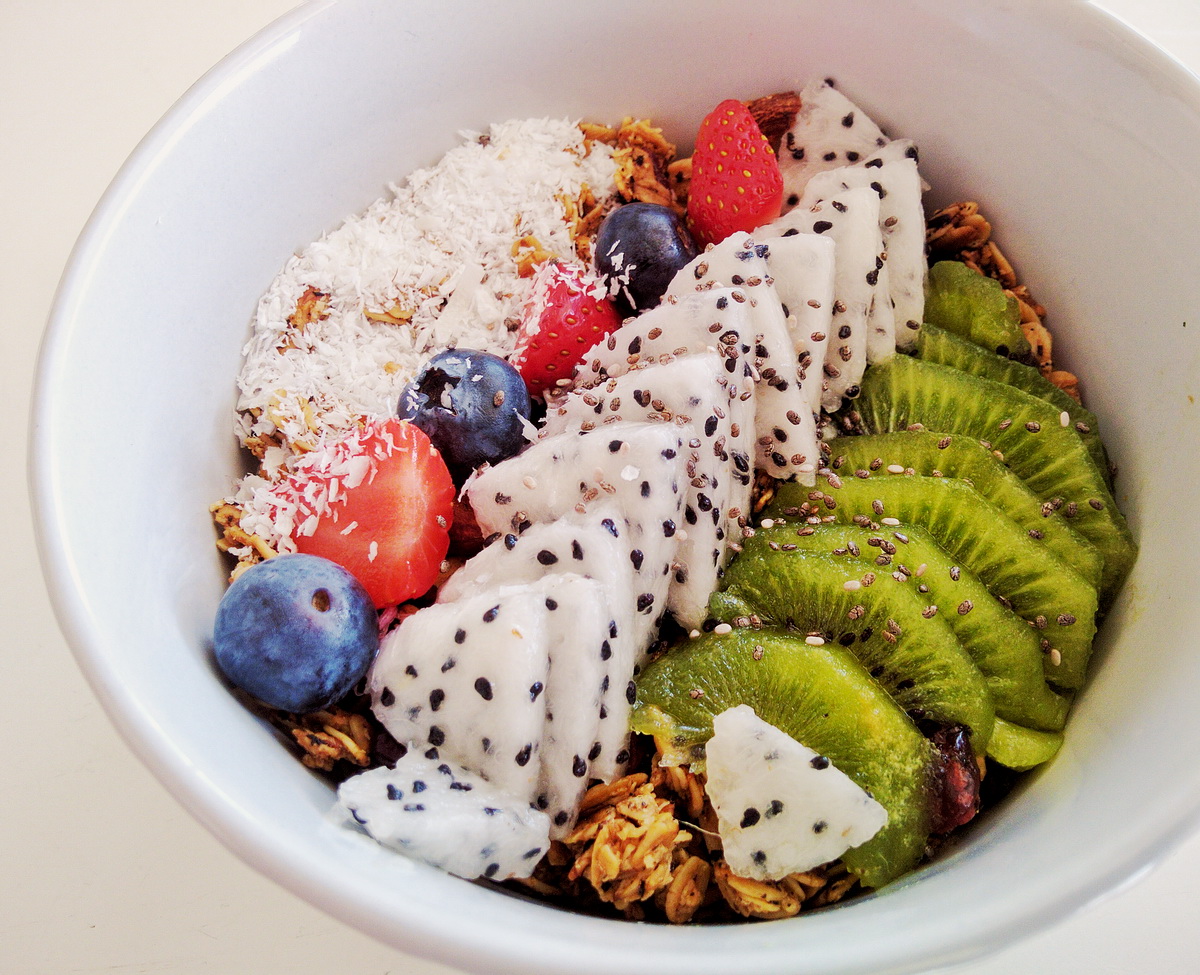
Here are the four images used in the video for demonstration purposes.


Let me know if you have found the video useful! I have planned a series of videos showing different shooting scenarios: shooting with smartphone in low light, dealing with black and white images and also more "shooting on the street with me" style video. If you have ideas on what else you want to learn from me, please leave me a comment!
It does not matter if you are not using the latest iPhone or the best Samsung smartphone. Any mobile phone camera is sufficient for some quick food snapshots. I personally do not like the idea of spending almost RM6000 for that flagship smartphone, it is just absurd. Use what you have, make the best out of it, and here, some post-processing magic may just add the much needed impact to your shots.
Straight out of camera shots from smartphones are usually dull and lack the "oomph" that make people go wow. The quick fix is normally the appalling filters or horribly rendered presets of ugly color bleaching and hipster-looking touch-ups. I believe photographs should be shown as close as possible to reality and post-processing can be used effectively to accomplish just that. Adding dark corner vignetting, overly warm color tones and that unfitting vintage look will not do your food photograph justice. Therefore, I was compelled to do a short step by step video to show you how you can achieve a decent looking food shot by improving it in post-processing using Snapseed by Google, an image editing app available free for both Android and iOS. Spending that additional 1 minute or less for each photograph will make a world of difference. Watch the video below to find out how.
Images and video capture were done on a Motorola G5S Plus.
Generally, here are the tips that can help you with your image editing, especially for food shots:
1) Color Balance
The camera may not necessarily get the color balance (white balance) right all the time, hence it is crucial to pay attention to the colors of the image you have shot and how closely they match what you saw in real life. Sometimes the camera overcompensates the colors, artificially neutralizes the natural warmth in the image resulting in cool, bluish tint that may not look so attractive in the image. Depending on the app that you use, the quick fix would be pushing the "warmth" slider to either boost the warmth or tone it down for that natural pleasing look.
2) Uneven Lighting
One of the important tips in shooting food is to have good light, and that usually means shooting what's on the table near the window. This often results in uneven light on the food, casting shadows in parts of the plates or bowls. In order to produce a more balanced image, adjust the "shadow, ambiance and highlight" sliders. Sometimes, uneven lighting may give you better results, as having shadows at the right places can shape your subjects better. Nonetheless, you have to be the judge of how much shadow is permissible, and if you have no control during the shoot itself, at least these tools in image editing allow you to manipulate the final result to a certain extent. Balance is what we are after here.
3) Edit In Moderation
Do not over-edit your image. I know it is easy to get carried away when there are so many sliders and you want to just push them everywhere to see what happens. The more you edit the more degradation will happen to the image. The less you edit, the simpler and less manipulation to the image, the better the final output will be. The less is more principle applies here. You are editing on a lossy image file (JPEG). Unless your smartphone allows you to shoot RAW (lossless) but I would recommend you not to do so unless you know absolutely what you are doing with a RAW file. If you are a practicing photographer and you are shooting RAW you should not need to read this guide. For everyone else, stay with as minimal editing as possible.
4) Boost Saturation and Contrast
The two important things when it comes to food shots are: texture and color of the food. In order to add depth and create that highly realistic look, adding both saturation and contrast can add impact to the food images. This works particularly well with shots that have multi-color food, such as vegetables and fruits. Textured food such as bread, noodles, or drinks with bubbles can benefit from contrast boosting.
5) Say No to Filters
I cannot emphasize this enough, using those stylistic filters generally destroys food shots. You can apply those filters on your photos of cats, your selfies or that nice looking bouquet of flowers. But never use them on food shots as they will rob away the natural colors or tones that make the food shots shine.
Here are the four images used in the video for demonstration purposes.
Let me know if you have found the video useful! I have planned a series of videos showing different shooting scenarios: shooting with smartphone in low light, dealing with black and white images and also more "shooting on the street with me" style video. If you have ideas on what else you want to learn from me, please leave me a comment!


Comments
Post a Comment